Introduction
The aim of this article is to bring all the related information of configuring the PyCharm IDE with pytest Testing Tool in one place. Here, I’ll not dwell deep into how testing is done in Python. But I’ll discuss the proper way of configuring PyCharm IDE with pytest testing tool to get the things up and running. This article is tested on a Windows 10 machine running PyCharm Professional Edition 4.5 with Python 2.7.9 interpreter.
Background
PyCharm is a popular IDE for Python Programming. More information about PyCharm can be obtained at https://www.jetbrains.com/pycharm/.
As a rule, the code we develop should be thoroughly tested before its release. Testing is a very important topic and has been discussed in great detail in the fine material. More information about pytest testing tool can be obtained at http://pytest.org/.
To gain more knowledge about testing techniques in general please refer to below books.
- Clean Code: A Handbook of Agile Software Craftsmanship
- Agile Testing: A Practical Guide for Testers and Agile Teams
- Software Testing: A Craftsman’s Approach, Fourth Edition
- Pragmatic Unit Testing in Java 8 with JUnit
- Practical Unit Testing with JUnit and Mockito
- Effective Unit Testing: A guide for Java developers
- The Art of Unit Testing: with Examples in .NET
Even though some of these books target other programming languages, still the knowledge that you gain from reading these books can be applied to Python Testing also.
Steps Involved in Configuring PyCharm to work with pytest Testing Tool
Here I assume that you have already configured your PyCharm IDE to run Python Interpreter. If not, you can download anaconda from https://www.anaconda.com/distribution/ and use it to configure the Python interpreter in PyCharm IDE.
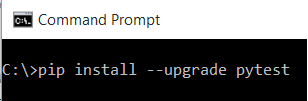
Step 1: In order to follow this tutorial, create a folder called PyArticle in C: drive. Install pytest testing tool using pip command as shown below.
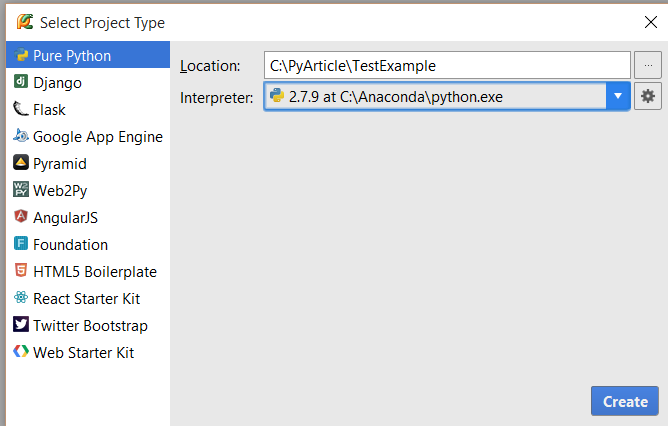
Step 2: Invoke PyCharm IDE and go to File -> New Project. Specify the path to the folder you created and also specify the name of the project. In our case the name of the project is TestExample. Press Create button. This takes you to the PyCharm editor.
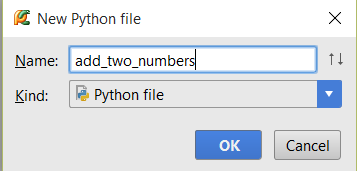
Step 3: Right Click on TestExample folder on the left pane of the PyCharm editor. Select New -> Python File

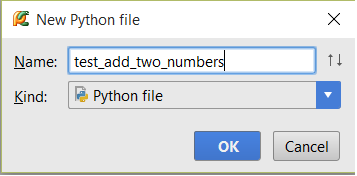
Step 4: Give the file name as add_two_numbers
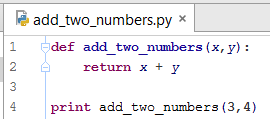
Step 5: Write the below given code in add_two_numbers.py file. This is a very simple code that adds up two numbers and returns the result.
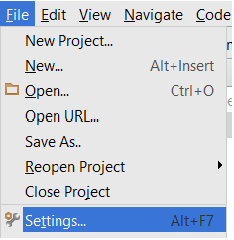
Step 6: Now go to File -> Settings
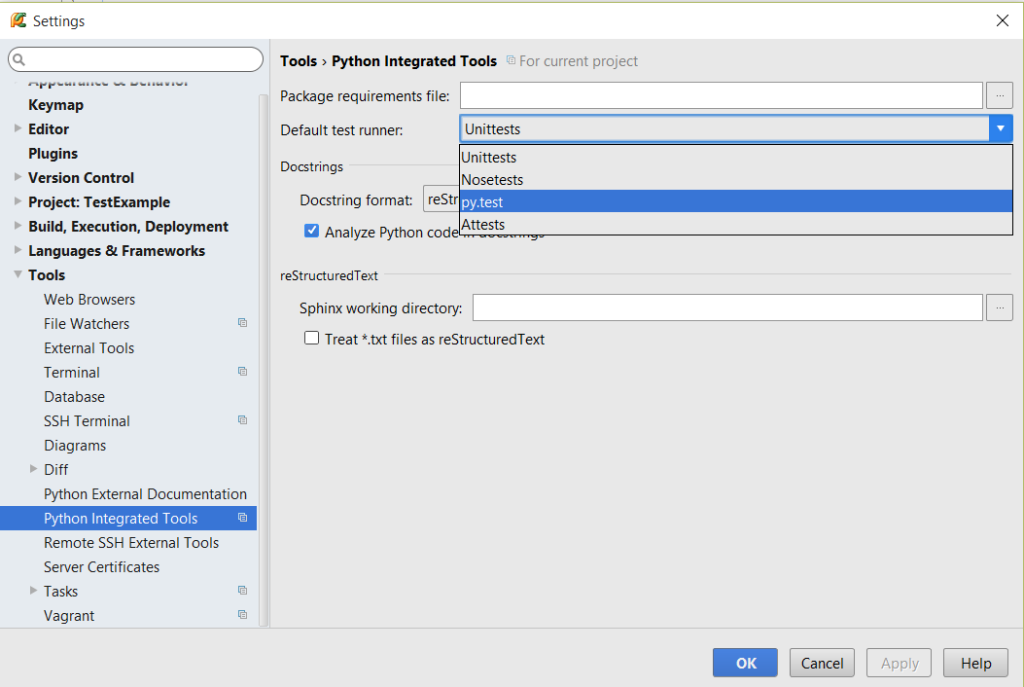
Step 7: In the Settings window, click on Python Integrated Tools in the right pane and select py.test as the Default test runner. Click on OK button.
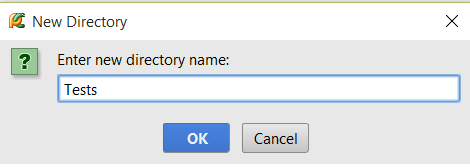
Step 8: Now right click on TestExample directory and select New -> Directory.

Step 9: Enter the directory name as Tests. We will have all our test files in a separate directory which is a good practice.
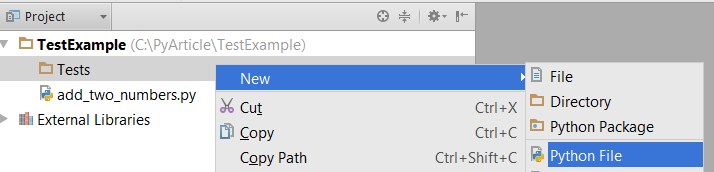
Step 10: Right click on Tests directory and select New -> Python File.
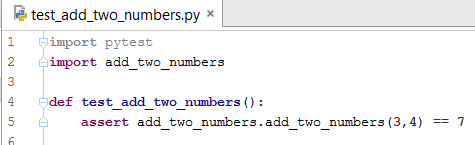
Step 11: Give the file name as test_add_two_numbers and click OK.
Step 12: Write the below code in test_add_two_numbers.py file. Notice that the word test_ has been prefixed for the test method.
All test methods should start with test_.
This is a very important step in the configuration and if the test method doesn’t start with test_ then you won’t be able to get proper output.
assert is used to check whether the condition is True or False.
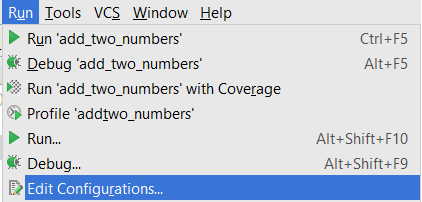
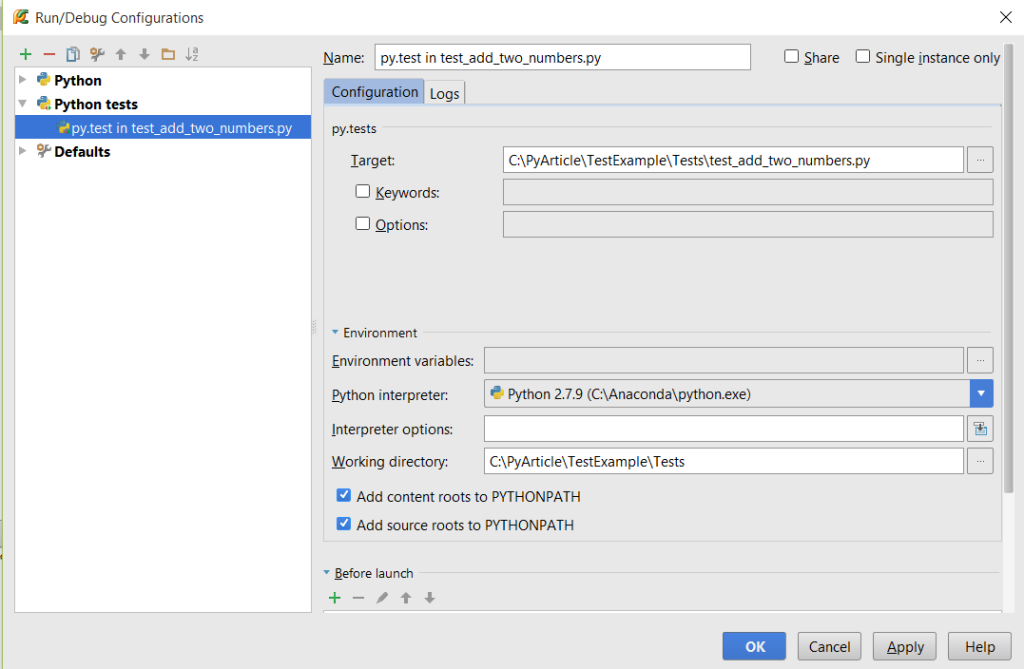
Step 13: Go to Run -> Edit Configurations.
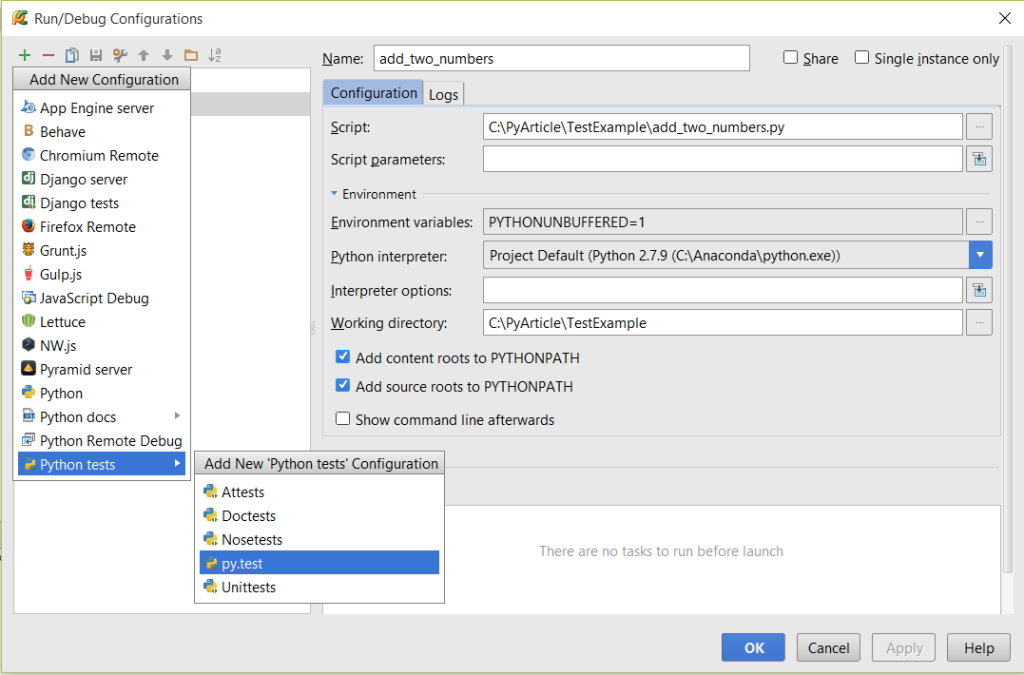
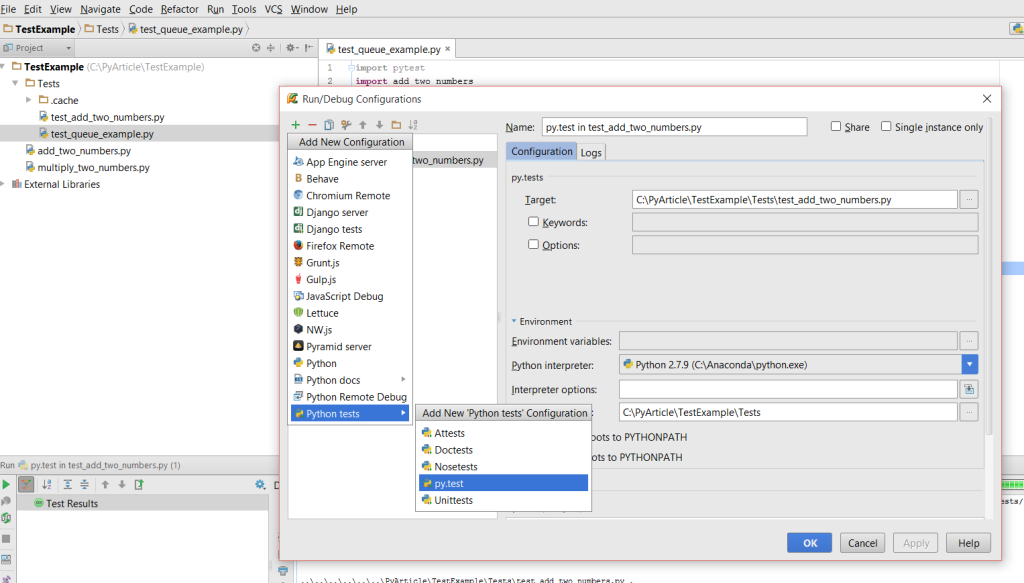
Step 14: In the Run/Debug Configurations window click on the + button found on the upper left corner. Go to Python tests and select py.test. Click OK button.
Step 15: On the left pane you can see Python tests is created. In the right pane for the Name text box give the value as py.test in test_add_two_numbers.py You should always prefix the Python test file name with the words py.test in.
For the Target text box specify the path to the Python test file.
For the Working directory text box specify the path to the directory which has the Python test files.
Click on OK button.
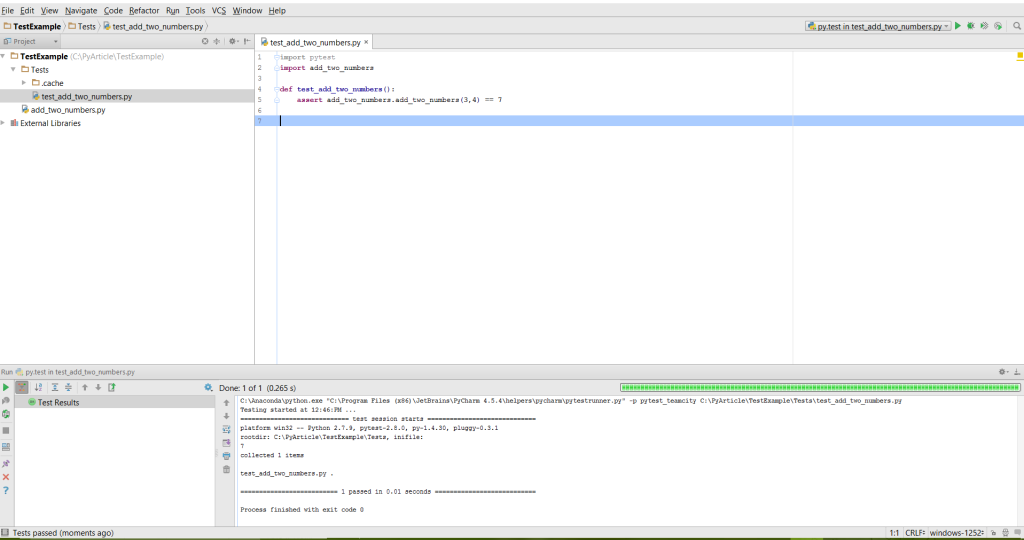
Step 16: Right click on the Python test file and select Run. As you can see in the Test Results the green color indicates that the test has successfully passed.
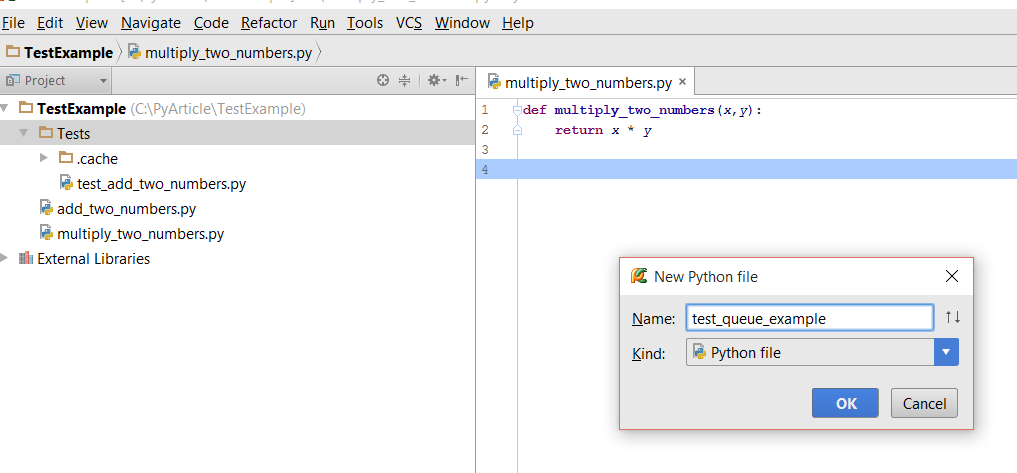
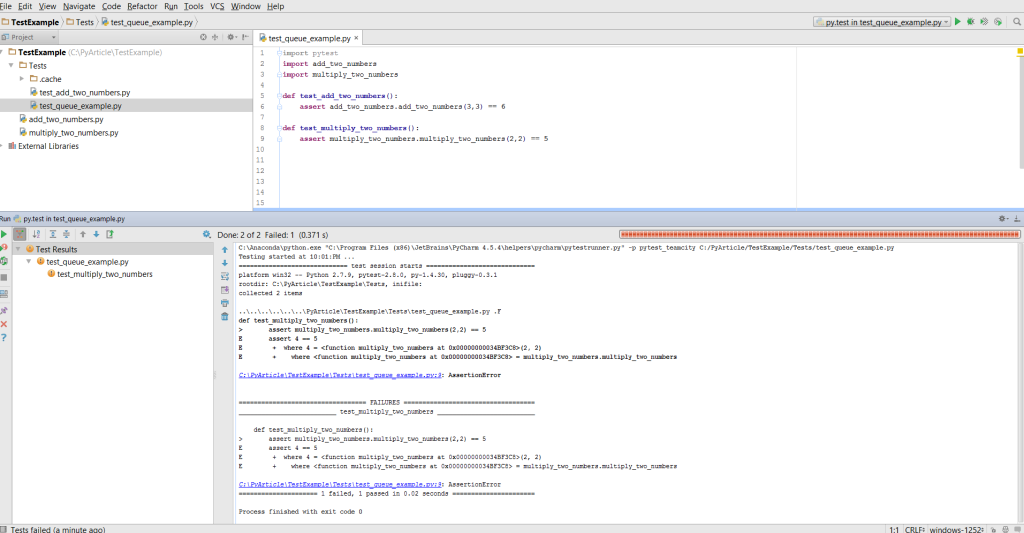
Step 17: What if you want to specify more than one test method? Lets find out the process to achieve the same. Create another python file called multiply_two_numbers and fill it up with the code shown below.

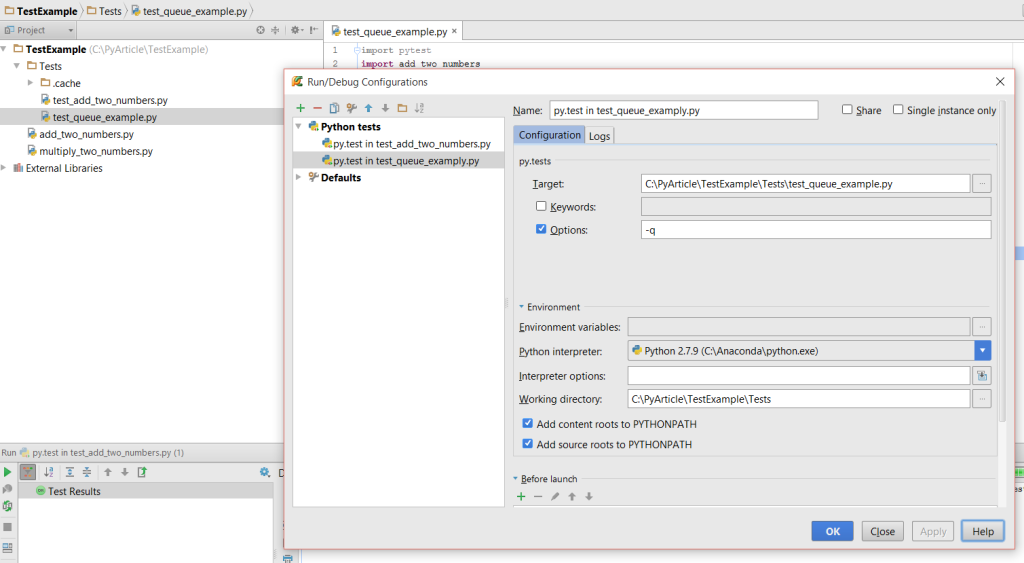
Create another Python test file called test_queue_example.
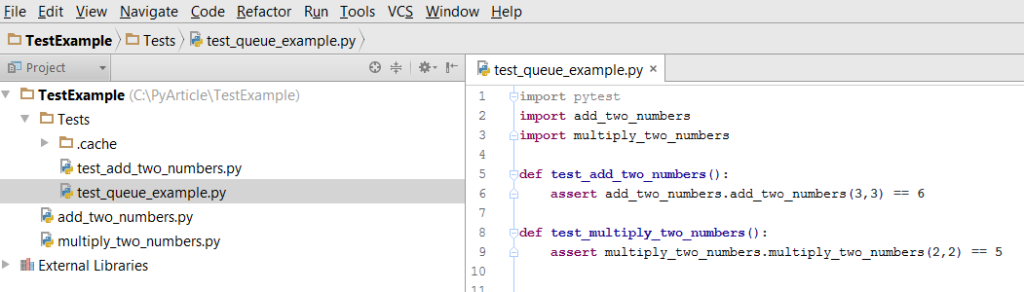
Fill it up with the code shown below.
While configuring the Python test file as shown in Step 13 – 15 check the Options check box and give the value as -q. Here q stands for queue.
Click on OK button after all the configurations are done.
Now right click on the latest test file and run. As you can see one test got passed while the other got failed.
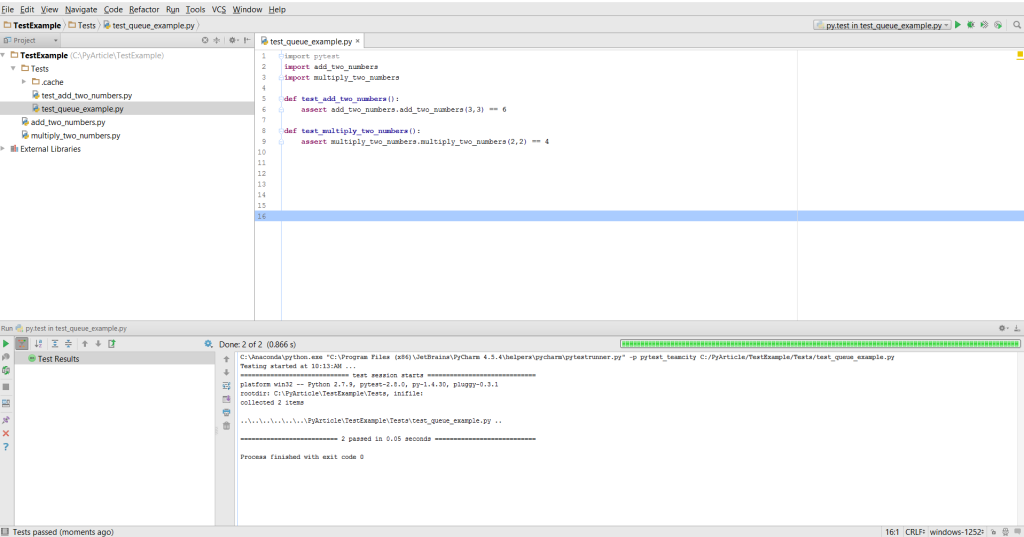
Change the code in test_queue_example as shown below and run the test program again. You can see that both the tests have passed.
Happy Coding!!!
Points of Interest
Testing our code is a very important aspect of software development. Using testing tools like pytest along with PyCharm IDE goes in a long way in developing quality code.
Comments
comments powered by Disqus